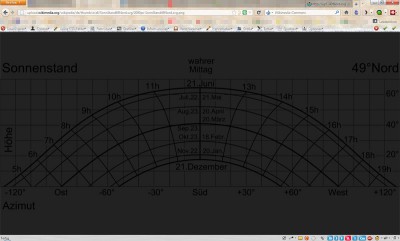
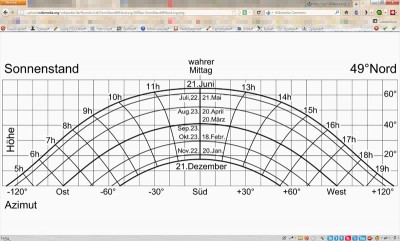
Am 13. März ist ja mal wieder ein neuer Firefox rausgekommen, nämlich in der Version 11. Abgesehen davon, dass ich diese wahnwitzig geringen Update-Intervalle total übertrieben finde – es kommt mir vor als hätten wir erst vor ein paar Wochen noch Version 3.6 gehabt – baut Mozilla da mittlerweile mit jeder Version neue „Annoyances“ ein, wie man sie sonst nur von Windows gewohnt ist. :twisted:
Auch in Version 11 gibt es wieder eine völlig überflüssige Neuerung: Wenn man ein Bild mit Rechtsklick → „Grafik anzeigen“ betrachtet, dann wird dieses nun nicht mehr einfach auf weißem Hintergrund an der oberen linken Ecke des Browserfensters angezeigt, sondern auf einem dunklen Hintergrund und in der Mitte des Fensters zentriert. Im ersten Moment dachte ich: „Verdammt, welches blöde Addon hat das denn verbockt?“ Aber dann merkte ich, dass es sich allen Ernstes um ein natives Firefox-„Feature“ handelt.
Obwohl ich mir beim besten Willen nicht vorstellen konnte, dass die Firefox-Entwickler nichts Wichtigeres zu tun haben als solche unbedeutenden Kleinigkeiten zu „verbessern“, versuchte ich, mich nicht aufzuregen. „Ist ja nicht so schlimm“, dachte ich. „Reine Gewöhnungssache. Bald wird es mir vielleicht sogar gefallen.“ Doch dann klickte ich auf ein transparentes PNG!

Ist doch klasse, oder? Und so leicht lesbar! ;) Naja, aber ich will mal nicht zu hart mit den Programmierern ins Gericht gehen. Dass Benutzer evtl. auch mal ein dunkles Bild mit transparentem Hintergrund betrachten wollen, ist ein derart unwahrscheinliches Szenario, dass sie es nun wirklich nicht hätten voraussehen können! [Ironie off]
Lösung: Addon oder userContent.css
Jedenfalls suchte ich schnell nach einem Weg, dieses voll ätzende Verhalten wieder loszuwerden. Dabei stieß ich zunächst auf das Addon „Old Default Image Style“, das freundlicherweise jemand allein zu dem Zweck geschrieben hat, diese Idiotie auf einfache und schnelle Weise wieder rückgängig zu machen.
Doch ich selbst wollte für so einen Schwachsinn nicht extra auch noch ein Addon installieren müssen. Also bearbeitete ich stattdessen meine userContent.css so, dass die Bildanzeige wieder wie früher funktioniert. Und das geht so:
- auf den Firefox-Button oben links klicken, dann auf „Hilfe“ → „Informationen zur Fehlerbehebung“
- den Button „Ordner anzeigen“ klicken
- den Ordner „chrome“ öffnen und dort die Datei
userContent.cssöffnen bzw. erstellen, wenn sie noch nicht existiert - in der Datei folgenden Code hinzufügen:
@namespace url(http://www.w3.org/1999/xhtml);
@-moz-document regexp("((.*\\.(png|apng|jpg|jpeg|gif|tiff|bmp))|(^data:image\\/.*))(\\?([^#]*))?(#(.*))?") {

	html > body {
		background-color: #ffffff !important;
	}

	html > body > img:only-child {
		box-shadow: none !important;
		margin: 0 !important;
	}

}
Nach dem Speichern der Datei und einem Neustart von Firefox sollte die Bildanzeige dann wieder wie gewohnt funktionieren. Den Code kann man natürlich noch beliebig anpassen – so habe ich z.B. statt reinem Weiß ein ganz leichtes Grau (#fafafa) als Hintergrundfarbe gewählt. Und wenn einen nur die Farbe gestört, die Zentrierung der Bilder jedoch gefallen hat, dann lässt man einfach die Zeile „margin: 0 !important;“ weg.
Das Ergebnis sind jedenfalls endlich wieder erkennbare transparente Bilder! ;)


2 Antworten zu “„Grafik anzeigen“ im Firefox 11”
Vielen Dank für den tollen Tipp.
Danach habe ich lange gesucht.
Danke für den Tipp. Den regulären Ausdruck hätte ich nie so hinbekommen. Für mich als Grafikdesigner ist wichtig zu sehen, ob ein Bild Transparenzen enthält. Deswegen habe ich mir als Bildhintergrund ein Schachbrettmuster erzeugt, also:
html > body > img:only-child {
background-color: #ddd !important;
background-image: linear-gradient(45deg, #bbb 25%, transparent 25%, transparent 75%, #bbb 75%, #bbb),
linear-gradient(45deg, #bbb 25%, transparent 25%, transparent 75%, #bbb 75%, #bbb) !important;
background-size:20px 20px !important;
background-position:0 0, 10px 10px !important;}
Für deinen Zweck (Lesbarkeit) wahrscheinlich nicht optimal. Ich erkenne dadurch aber gut, ob ein Bildhintergrund durchsichtig oder weiß ist.