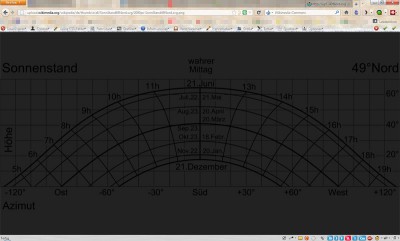
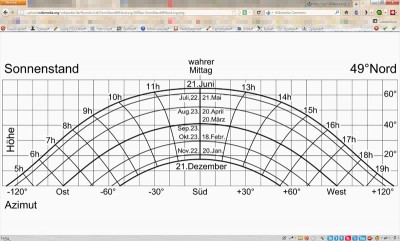
On March 13, a new Firefox version came out once again, namely version 11. Apart from the fact that I find their insanely small update intervals completely over the top – to me it seems like version 3.6 was only a few weeks ago – Mozilla now started to build in new “Annoyances” with each release, in a somewhat Windows-like manner. :twisted:
In version 11 there is again a totally unnecessary feature: If you look at a picture via right click → “View image”, it is no longer displayed on a white background at the upper left corner of the browser window, but on a dark background and centered in the middle of the window. At first I thought, “Damn, which of my stupid addons is screwing up here?” But then I realized that this was, in all seriousness, a native Firefox “feature”.
Although I could not for the life of me imagine that the Firefox developers don’t have anything more important to do than to “improve” such details, I tried to stay calm. “It’s not that bad”, I thought. “Pure matter of habit. I might even like it soon.” But then I clicked on a transparent PNG!

Great, isn’t it? And so easy to read! ;) But well, I don’t want to be hard on the programmers. Users wanting to look at a dark image with transparent background is such an unlikely scenario, they really could not have foreseen it! [Irony off]
Solution: Addon or userContent.css
Anyway, I quickly looked for a way to get rid of this totally awful behavior. First I stumbled across the addon “Old Default Image Style“, which someone kindly wrote for the sole purpose of undoing this idiocy in a simple and quick way.
But I personally didn’t even want to install an addon for such a rubbish. So I edited my userContent.css instead, so that the image display behaves the way it did before. Here’s how:
- click the Firefox button in the upper left, then click “Help” → “Troubleshooting Information”
- the click the button “View folder”
- open the folder “chrome”, then open the file
userContent.cssor create it, if it doesn’t exist - add the following code to the file:
@namespace url(http://www.w3.org/1999/xhtml);
@-moz-document regexp("((.*\\.(png|apng|jpg|jpeg|gif|tiff|bmp))|(^data:image\\/.*))(\\?([^#]*))?(#(.*))?") {

	html > body {
		background-color: #ffffff !important;
	}

	html > body > img:only-child {
		box-shadow: none !important;
		margin: 0 !important;
	}

}
After saving the file and restarting Firefox, the image display should work as usual again. The code can be customized as desired, of course – for example, I chose a very light gray (#fafafa) as the background color instead of pure white. And if only the color bothered you, but not the centering of the image, you can simply leave out the line “margin: 0 !important;”.
As a result, transparent images will finally be recognizable again! ;)


2 responses to ““View image” in Firefox 11”
Vielen Dank für den tollen Tipp.
Danach habe ich lange gesucht.
Danke für den Tipp. Den regulären Ausdruck hätte ich nie so hinbekommen. Für mich als Grafikdesigner ist wichtig zu sehen, ob ein Bild Transparenzen enthält. Deswegen habe ich mir als Bildhintergrund ein Schachbrettmuster erzeugt, also:
html > body > img:only-child {
background-color: #ddd !important;
background-image: linear-gradient(45deg, #bbb 25%, transparent 25%, transparent 75%, #bbb 75%, #bbb),
linear-gradient(45deg, #bbb 25%, transparent 25%, transparent 75%, #bbb 75%, #bbb) !important;
background-size:20px 20px !important;
background-position:0 0, 10px 10px !important;}
Für deinen Zweck (Lesbarkeit) wahrscheinlich nicht optimal. Ich erkenne dadurch aber gut, ob ein Bildhintergrund durchsichtig oder weiß ist.